Posts

Don't break out the level (or a protractor)
Image
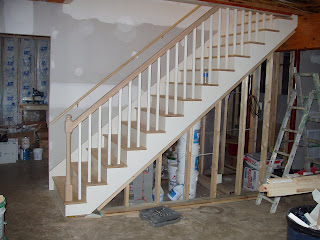
So after the first of my final inspections I had a small list of things to take care of which were completed over a couple of days. During my second final inspection, which was performed by a different inspector, it was pointed out that I would need to install a railing on the basement steps. Yes. I should have thought of that. So last Saturday I installed my first railing system and I think it turned out pretty well (see title). During my third final inspection I received the offical sign-off and it's on the C.O. (Certificate of Occupancy). A little piece of paper that says, "It's OK to move in now." And it only took two years. Go figure.
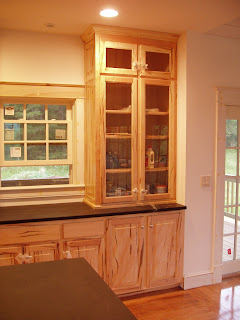
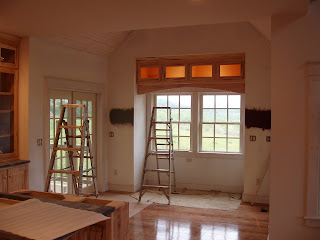
Tile, Kitchen Cabinets and Farmhouse Faucet

Image
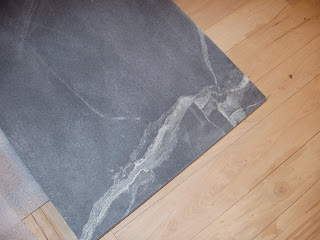
Here are a few more recent pictures. The beautiful tile work is all complete thanks to Aqua Fit USA in lovely downtown Crozet. The soapstone counters are also in and look better than I had imagined. Thanks Mike. They are a little softer than I thought they would be, but I think the gradual wear that they will show will benefit the overall look. The stair and loft railing are back in place, thanks again to Tim and Bobby for all their work. I'm going to have to start another project just because those guys are so great to work with.

A Few Good Cabinets

Image
Riner's Cabinet Shop strikes again. This time Craig came up with a short bank of cabinets to go in the dining room bump-out. After putting the windows in, I felt the the ceiling really need to come down to make the space more intimate. There was a small dilemma in that recessed lighting had already been installed in the ceiling. Solution: Uncle Earl! Uncle Earl does beautiful stained glass work and has graciously agreed to build four small panels to fit in the doors. Throw the switch and Viola! Beautiful back-lit stained glass. It nice when things come together... See the original sketch.

Soapstone Counter Tops

Image
The soapstone counters have been delivered and several pieces have been dry-set. I'm really please with how the swirls in the stone coordinate with the flames in the maple. It will be interesting to see how it looks when the island gets set in place.

Railing Work Almost Complete

Image
Tim and Bobby have almost completed the railing around the porch. Even though we decided to go with a simple deck style railing it turned out looking very nice. It gives the porch a nice comfortable feel. It's a lot more fun sitting on the front porch when you don't have to worry about taking a drive over the edge. Opening up the dinning room doors and being able to move from the front porch to the back porch is also a real treat.

Window and Door Casings

Image
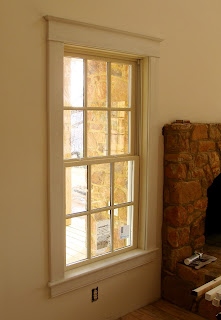
The window and door trim is coming together nicely. All the pieces were custom milled either on site or at Riner's. Who knew that Charlottesville would be such a mill-work desert? I miss being able to run over to Portsmouth Lumber to pick up the old-style casings, but it has been fun getting back into the shop and watching the piles of sawdust grow. It's certainly a nice contrast to sitting in front of a computer. All the trim will be painted to match the Navajo White of the sashes and doors. Yes, that's a lot of painting. I have plenty of brushes if anyone is interested.
Image
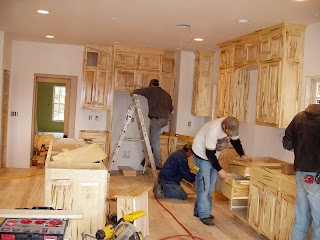
The beautiful wormy maple cabinets were installed today by the talented crew from Riner's Cabinet Shop. It's starting to feel more like home everyday! On another note, Tim and Bob have soon an incredible amount of patience with me on getting the stair case details just right. The rail had to come down to make room for the floor finisher (forgot the camera that day).

December Update

Image
I received a great Christmas present: the wormy maple floors installation is finished. The re-milling proved to be the way to go. Even with the checks and curls and bows we were able to run some nice long pieces. I can't wait to see how it finishes out. The tongue and grove pine ceiling was also completed along with the pine 1x wrap on the big ridge beam. The HVAC is almost complete as well. The electricians are finishing up their part today and soon as the drain line is hooked up she'll be good to go. It's really nice to see it all starting to come together. I think that I've come up with a solution for the dining room window (as long as the wife approves). Hopefully it will balance out the space nicely and visually tie into the kitchen as well. Look for an open-house invite some time in March (hopefully). I hope everyone has a great New Year!

Turning up the Heat

Image
The bulk of the furnace was installed over the last week. The three zone system with its returns, diverters, etc. made for a behemoth of a unit. Good thing there was plenty of space for it. It will be interesting to see how the unit will function in conjunction with the two wood stoves.

Hardwood floor is turning out to be a bear

Image
The wormy maple flooring is turning out to be very difficult to install. The random widths, floating tongues, and shallow grooves make every piece unique. I've learned a couple of tricks that have helped to get the floor looking better, but it is going very slowly. I think that the end result is going to be beautiful, but getting there is going to require vast amounts patience.

Finished, Primed and Delivered

Image
The drywall got finished and the painters were able to get in over the weekend and prime the whole inside and get one coat of finish paint on all the exterior trim. You would have thought that I would have taken a picture of the outside. On a separate note... the weather finally cooperated enough to allow the flooring to be delivered. That's a lot of wood. Thank fully I had a lot of help unloading.

Insulation and Drywall in Place

Image
I've been a bit slow in posting new information so this entry covers a couple of weeks. The insulation has been completed. The exterior walls contain blown-in cellulose (gray stuff you can see in the background) that has an R-21 value and the roof and attic have R-38 batts. It should be pretty cozy this winter. The drywall was delivered, hung, and finished in just about a weeks time. Muy rapido! Those 24 foot walls are going to be a chore to paint, but I've got a top-notch guy on the job.

Siding complete

Image
Tim and Bobby got the siding finished up on Friday. It will be interesting to see how well the Pre-finished Hardie Siding holds up in the long run. Right now it looks great, and the color-matched caulk is spot on. They took a lot of care during installation as to not scratch or chip the surface.

Not sure what to call it?

Image
This is a shot of the rock wall that is located in the basement behind the wood stove (which is not installed yet). Most of the choice stone was incorporated into the construction of the chimney, so the pickin's were slim for this bit although it still turned out really nice. I'll be curious to see how well the stone holds the heat once the stove runs for a few hours.

Work on siding continues

Image
We still haven't worked out the details for the porch posts, but the siding is really looking nice. I hope that the pre-finished Hardie Plank holds up as advertised.

Progress Continues

Image
Things have gone a bit slowly this month, but we are still moving forward. The electricians have been out and most of the rough-in is complete. The stairs to the basement have been put in which saves a lot of running around. The siding is about 75% complete, and the decks are down on both the front and back porch. The weather has been nice although we could really use some rain. Clear sky days in August are a bit rare around these parts.

Yellow Siding and a Peek Inside

Image
The remaining windows and doors were installed this week, and the fellas got a good jump on the siding. I was having some decision making issues pertaining to the window trim, but I finally got it worked out so that things could continue. Although new/modern windows have some nice feature, it's hard to make them look like they've been there for 50 years. The machine formed aluminum channel that runs around the exterior (to increase rigidity?) is hard to hide. I decided that finding a balance so that the trim worked with it was better (and cheaper) than trying to cover it up. It seems as though it's going to work out very well.

There's nothing like the Blue Ridge

Image
It's a shame that this image is a bit soft, but maybe it just adds to the beauty. As you can see from this picture, there is nothing quite like the Blue Ridge Mountains in the rain. With the bits of clouds laid into the valleys, it gives tremendous sense of calm.

Off like a firecracker!

Image
Today we celebrated Independence Day by becoming truly dried in. Tim, Bobby and Peter sacrificed most of their day to finish up the front porch. Thank you all very much for all your hard work. The place is looking fantastic.

Retaining Wall and the Front Porch

Image
After a good soaking (somewhere between 5" & 7" fell in a weeks time) the crews were back. Tim and Bobby jumped on the front porch and Deibert and company knocked out the front retaining wall. It would have been prettier to do it in stone, but the brick was available and quite a bit faster/cheaper. The roofers got started on the back. I decided to go with copper flashing - a 50 year shingle needs flashing to match. The down side is that the copper is $12 a foot! Having all the separate parts and pieces make the house more interesting to look at, but it also drives up the cost per square foot.